- generate the .conf file you want to use with the WG Manager tool and save it locally
-
VPN > WireGuard > Endpoints > '+' sign to add an endpoint
Name: give it a name to describe it
Public Key: copy & paste the PublicKey string from the .conf file
Allowed IPs: add 0.0.0.0/0 and ::/0
Endpoint Address: the Endpoint hostname from the .conf file
Endpoint port: any from the range 51821 to 51900
Keepalive: 30
Screenshot
-
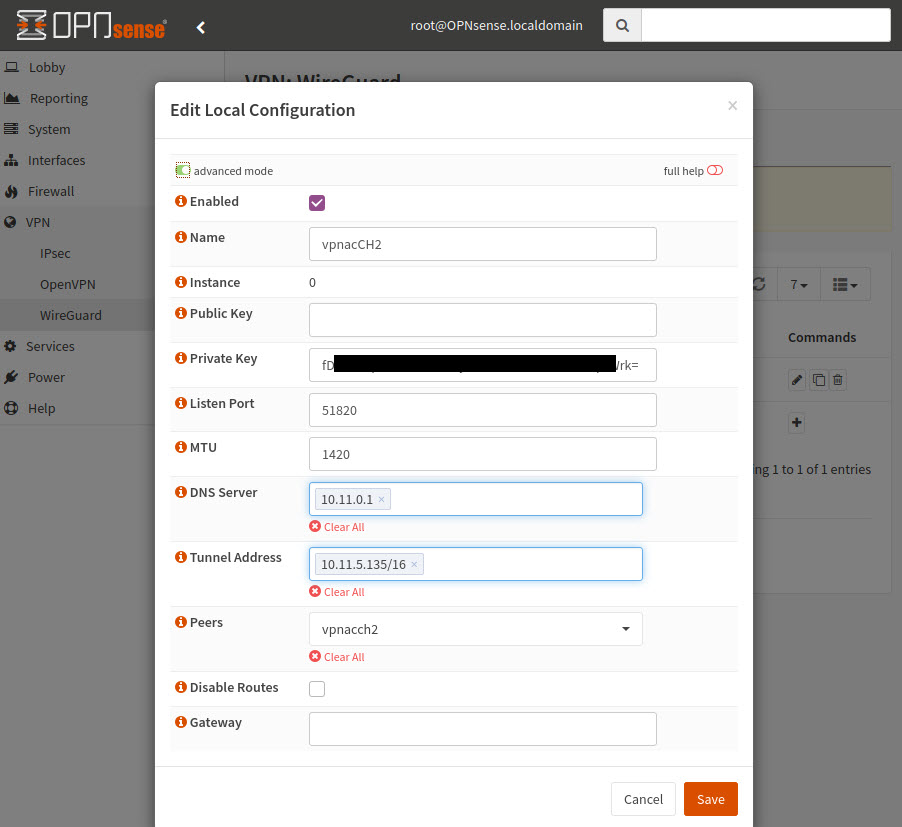
VPN > WireGuard > Local > '+' sign to add a local configuration and add the following:
Name: anything to describe the configuration
Private Key: [copy & paste the private key from the .conf file]
Listen port: it's the local port, use the default 51820 or change it to other
MTU (visible if the Advanced mode was checked): leave default or use 1420 if you face problems with some sites not loading or being very slow
DNS Server: 10.11.0.1
Tunnel Address: the 'Address' listed in the .conf file such as 10.11.x.y/16
Peers: select the peer created earlier
Disable Routes: unchecked
Gateway: leave blank
Screenshot
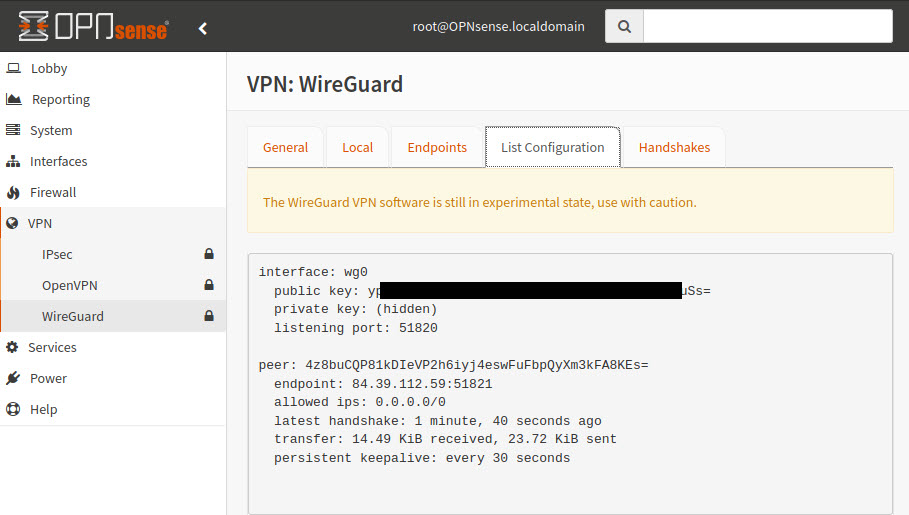
4. In the WireGuard General tab, Enable WireGuard and Save
Now check in the List Configuration tab if it established a handshake with the server and the transfer shows some bytes in and out. If yes, proceed forward.
Screenshot
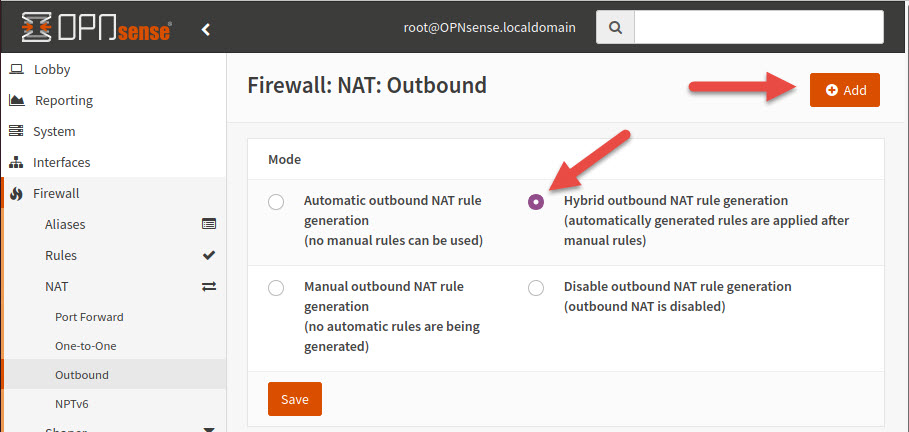
5. Open Firewall > NAT > Outbound and set Mode to Hybrid outbound NAT rule generation, Save and Apply changes
Screenshot
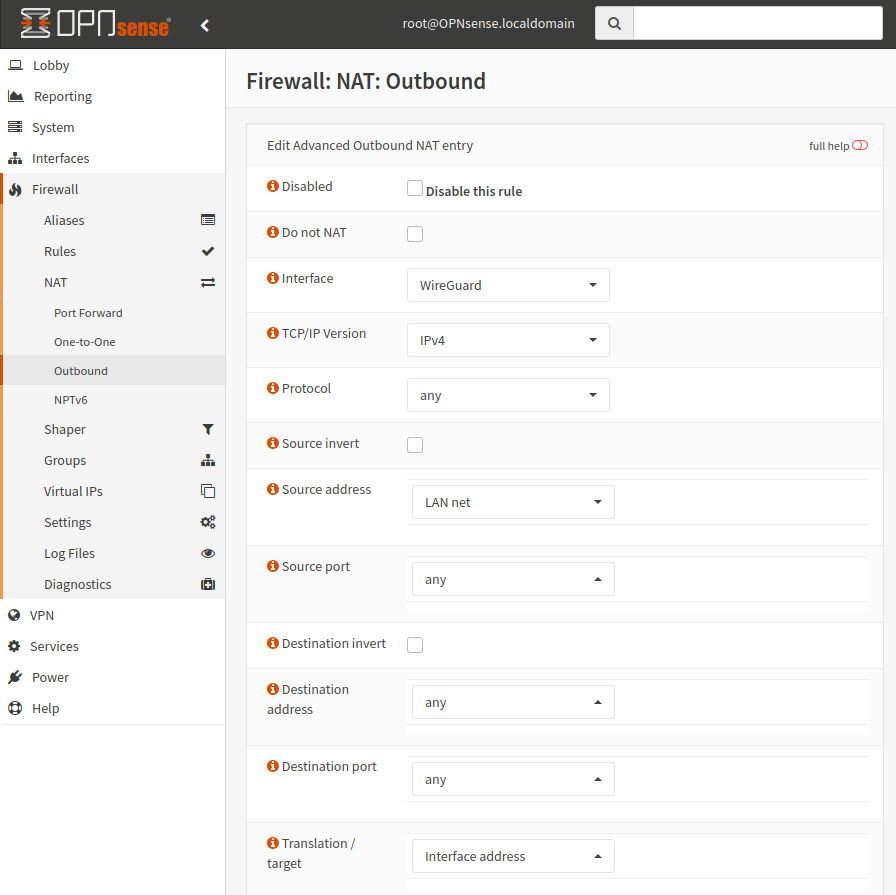
+ Add a new rule and set the following:
Interface: WireGuard
Source Address: LAN Net
Translation / target: Interface address
Save, Apply changes
Screenshot
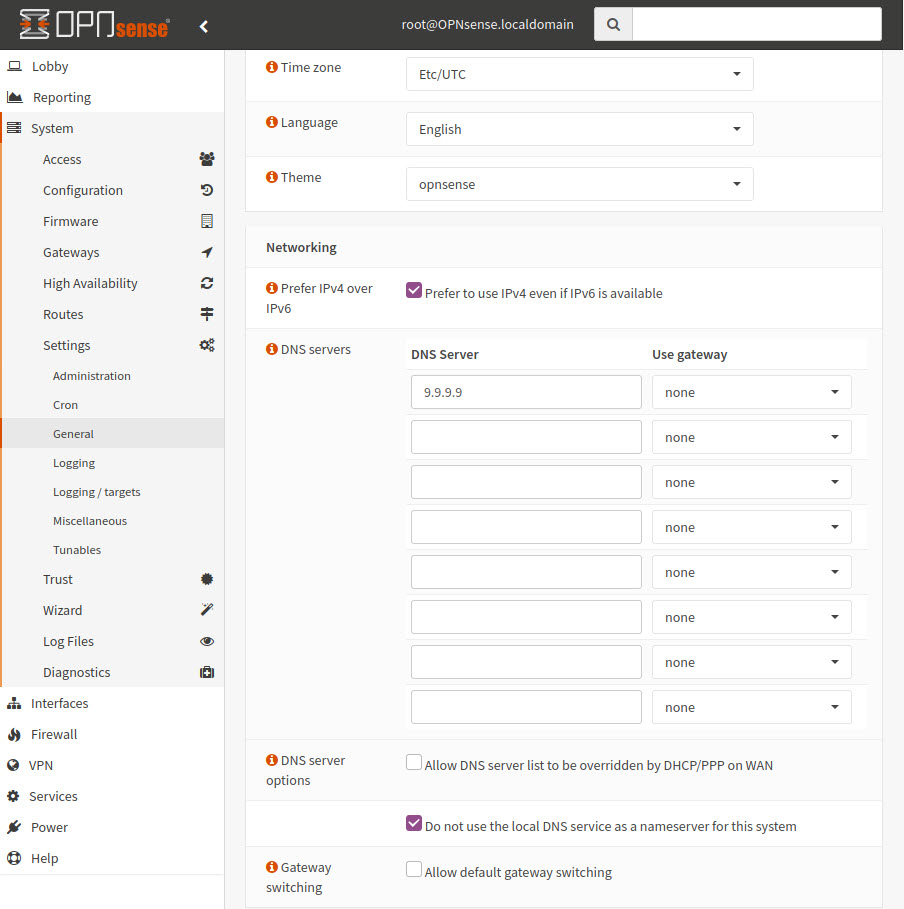
6. For your LAN devices to work properly with the VPN connection, set static DNS servers in System > Settings > General Prefer IPv4 over IPv6: checked
DNS servers: add the public DNS servers you want to use. We recommend 9.9.9.9 and 1.1.1.1
Important note: while the VPN is connected, all DNS queries would use our private DNS resolvers.
Allow DNS server list to be overridden by DHCP/PPP on WAN: unchecked
Do not use the local DNS service as a nameserver for this sytem: checked
Screenshot
Now go to VPN > WireGuard and re-enable it by re-checking the Enable WireGuard checkbox and Save. (disable it once, enable it back to force a restart)