Some Linux distributions include support for Wireguard via Network Manager, making it very easy to set a connection without using the terminal. First check if your Linux distro supports it. The following guide has been created on Manjaro Linux running KDE Plasma.
- Generate the .conf file using the WG Manager Tool
- Open the
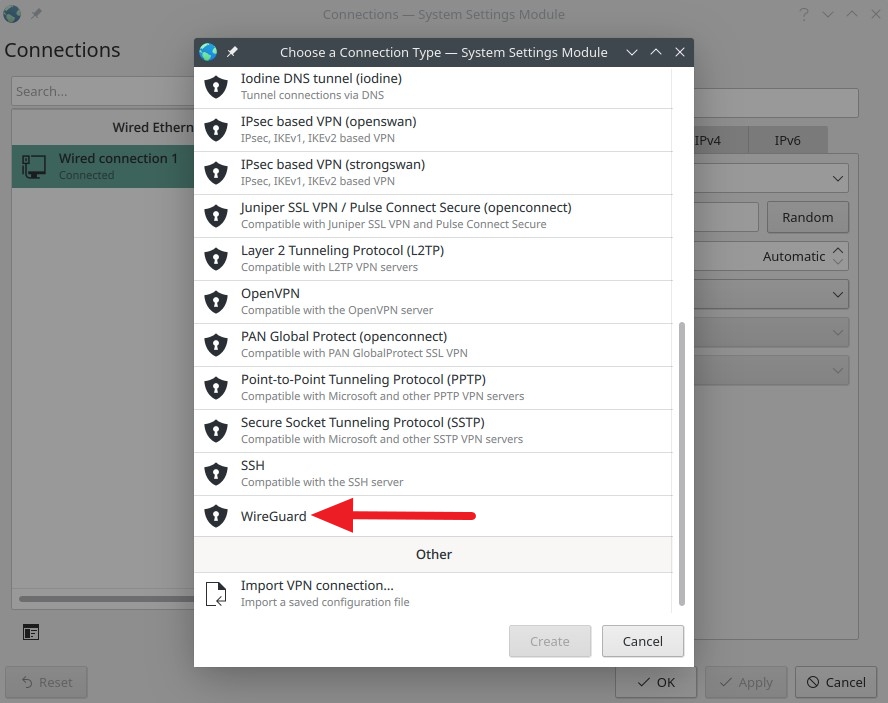
Network Connections (right click on the networking icon > Configure Network Connections…), Add new connection and scroll down to select WireGuard from the list of connection types
Screenshot
- Add the corresponding values from the .conf server profile generated earlier into the Network Manager Wireguard configuration
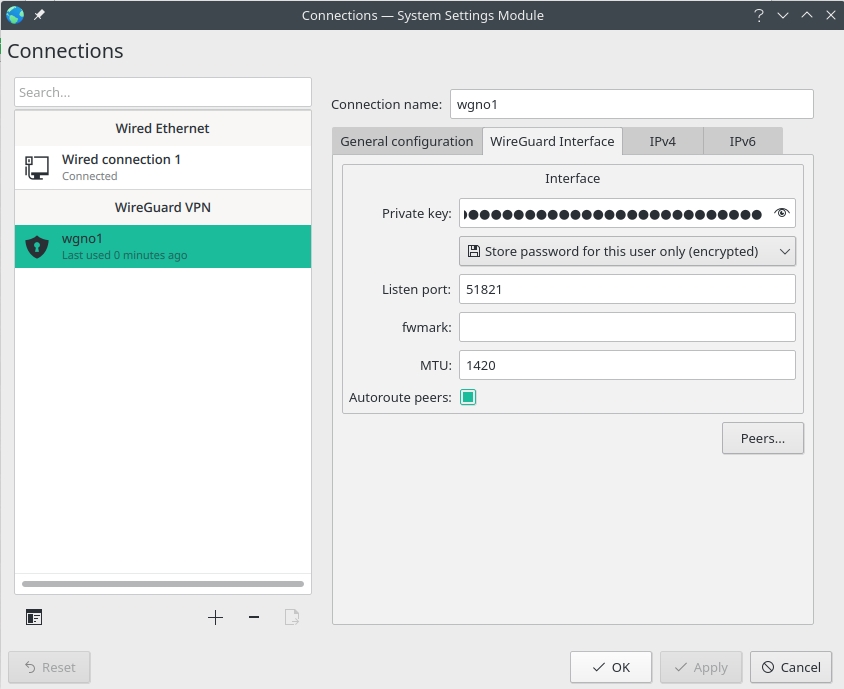
Connection name: a short name such as ‘wgno1’ – this will be the WG interface name.
- In WireGuard Interface tab, add your private key from the .conf file. Use any port as source, in our example we will use 51821. Set the
MTU to 1420
Screenshot
- Open
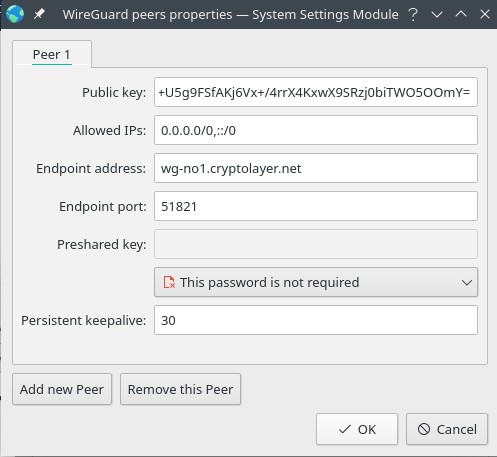
Peers… to add the server info:
Public key: the server public key from the .conf file (it is a unique value for each server)
Allowed IPs: 0.0.0.0/0, ::/0
Endpoint address: the server hostname from the .conf file
Endpoint port: any port from 51820 to 51900
Screenshot
- Open the
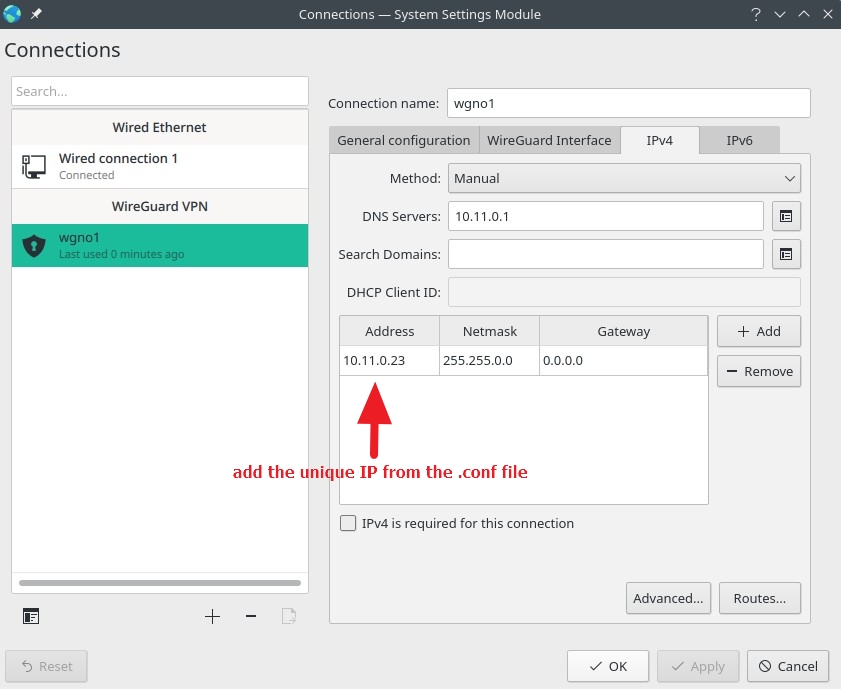
IPv4 tab and add the following:
Method: Manual
DNS Servers: 10.11.0.1
Address: your IPv4 address from the .conf file (10.11.x.y), Netmask 255.255.0.0 and gateway 0.0.0.0
Screenshot
Apply the settings and connect by right-clicking on the new connection from the Connections list > Connect. Check connectivity and run the test at https://ipx.ac/run to make sure that it is working properly.